

I’ve been looking at ways I can increase sharpness in my images in photoshop that don’t introduce too much noise. The unsharp mask filter is OK, but I wanted something that gave me more control. I came across the technique of using a High Pass filter to create a high frequency image layer, and then using this in overlay blending mode to create the output.
I am trying this out first on my Seagull Nebula image. Below is the image as it was after stretching. It was pretty good, but I wanted to have it “pop” a little more.

Here is the same image after applying this technique to sharpen the details using a high pass filter. it is a subtle difference, but I think you will agree there is more definition and it appears less muddy, without being overly sharpened or introducing too much noise.

So how do I do this in Photoshop?
First, I create a layer that is my finished stretched image, and then duplicate that layer.

Select this layer and then go to Filter >> Other >> High Pass and in this box you will drag the slider to adjust the intensity of the high pass filter. The higher the slider, the more of the image will be used, as you can see below. You will set the slider to the position that highlights the amount of the image you wish to sharpen


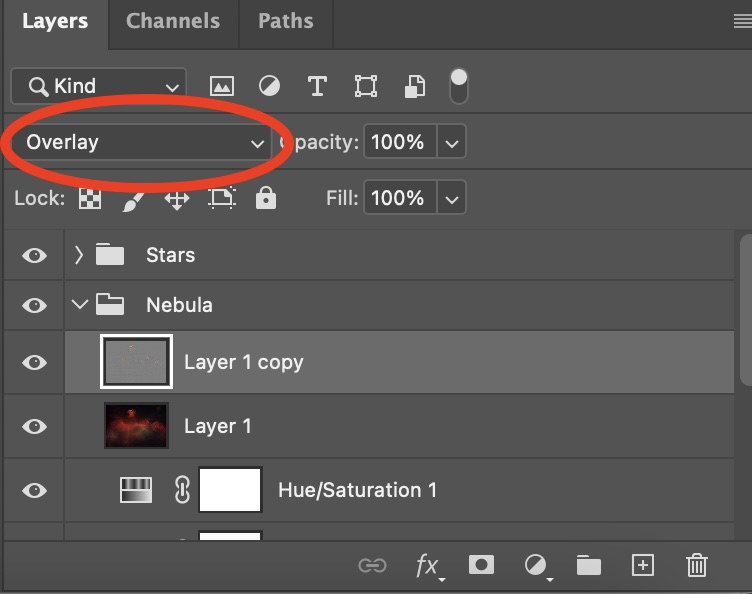
Once you have determined the amount of high pass filter you wish to apply select OK. You will now have a strange looking image. The key now is to select “overlay” as the blending mode for this layer.

Now the selected the image should look much better, and you will have your sharpened blended image with high frequency data blended with the original image.
You can adjust the opacity of this layer to reduce the effect if you feel it is too strong.
Discover more from Nicks Astrophotography
Subscribe to get the latest posts sent to your email.
